
Nextcloud is a suite of client-server software for creating and using file hosting services, in this article, we will learn how to install nextcloud on ubuntu. Nextcloud provides functionally similar to Dropbox, Office 365 or Google Drive when used with integrated office suite solutions Collabora Online or OnlyOffice. It can be hosted in the cloud or on-premises.
Nextcloud files are stored in conventional directory structures, accessible via WebDAV if necessary. SQLite, MySQL or PostgresSQL database is required to provide additional functionality like permissions, shares, comments.
Nextcloud has planned new features such as monitoring capabilities, full-text search and Kerberos authentication, as well as audio/video conferencing, expanded federation and smaller user interface improvements.
Features:
- Easy access anywhere
- Seamless collaboration
- Rich workspaces
- Find everything in one place
- Secure file exchange
- Deep integration
- Ultimate security
Step 1: Installing Updates
sudo apt update
sudo apt dist-upgrade
Press tab to put over to OK option. if it ask for service restarts.
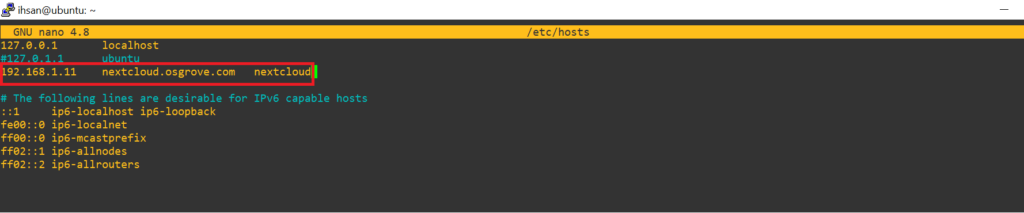
Now we set our hostname.
sudo hostnamectl set-hostname nextcloud.osgrove.com
also configure hostname in below file location to make it permanent.
nano /etc/hostname
We are using below hostname:
nextcloud.osgrove.com
To check a hostname type below command:
hostname
Step 2: Download Nextcloud
Copy the link address which get from their offical website and extarct the link throug wget command
wget https://download.nextcloud.com/server/releases/latest.zip
We will Check the zip file after setting up LAMP server.
Step 3:
First install Apache web server through following command
apt install apache2 -y

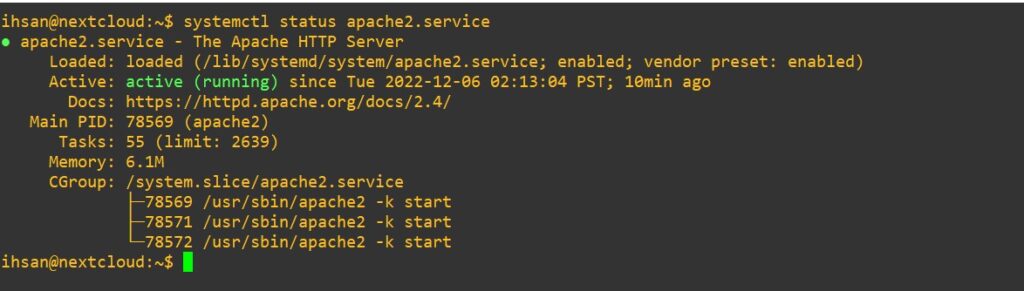
check its status
sudo systemctl status apache2
Now install MySql through the following command
apt install mariadb-server -y
check its status
sudo systemctl status mysql
Also, install PHP libraries through the below command
apt install php libapache2-mod-php php-mysql -y
Once the installation is finished, you can run the following command to confirm your PHP version:
php -v
Now make our DB server secure:
sudo mysql_secure_installation
We haven't set root password for mariadb that's why press enter
unix_socket authentication = n
change the root password = Y
set root password for DB= n
repeat again
remove anonymous user = Y
disallow root login remotley = Y
remove test database and access to it = Y
reload privilege tables now? = Y
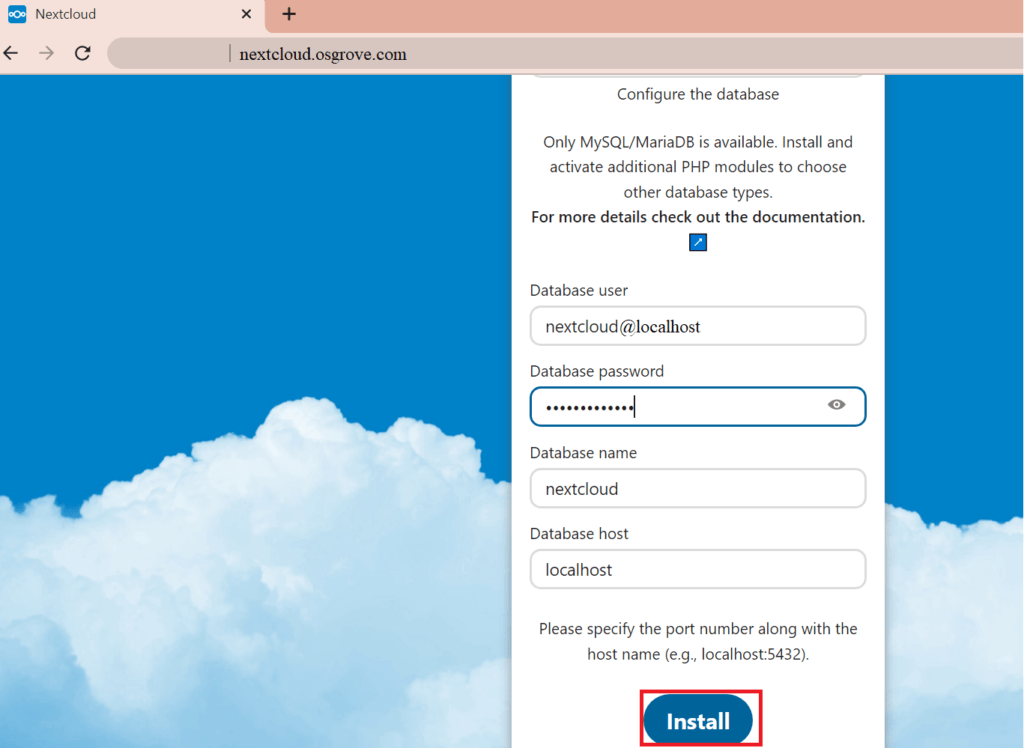
Step 4: Now setup a DataBase for NextCloud Server.
sudo mariab
CREATE DATABASE nextcloud;
SHOW DATABASES;
We will give Grant to access DataBase:
GRANT ALL PRIVILEGES ON nextcloud.* TO 'nextcloud@localhost' IDENTIFIED BY 'password';
FLUSH PRIVILEGES;
Now ctrl press d to exit mariadb prompt.
Now make sure to enable following PHP modules for Apache:
sudo a2enmod dir env headers mime rewrite ssl
sudo systemctl restart apache2
Enable the recommended PHP extensions:
sudo phpenmod bcmath gmp imagick intl
Step 5: Now we unzip the nextcloud image.
Install unzip package through following command if its not availabe:
now apt install unzip
unzip next.zip
We have the nextcloud directory.
My user is not the user which is going to serve this content so lets change its permissions:
sudo chown www-data:www-data -R nextcloud
now moved this to the document’s root directory. we will move to the designated location.
sudo mv nextcloud /var/www/
Lets disable the site which comes with default with Apache.
sudo a2dissite 000-default.conf
now restart apache.
Systemctl restart apache2.service
Step 6:
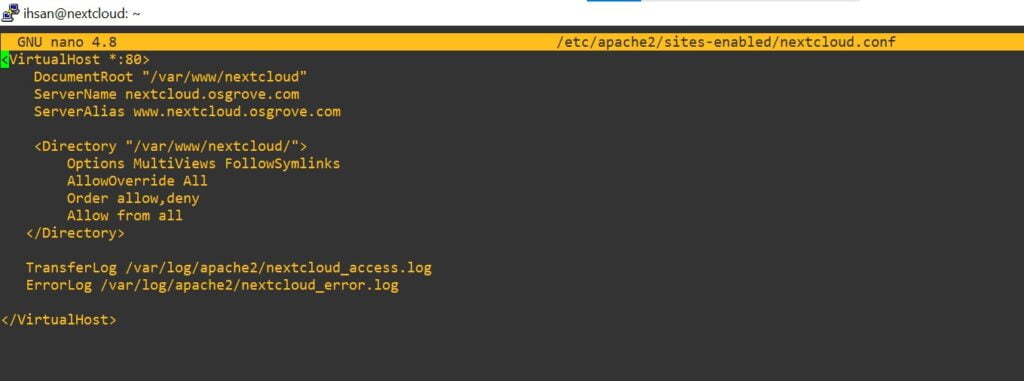
We will set up a config file for Apache that tells it how to serve Nextcloud.
sudo nano /etc/apache2/sites-available/nextcloud.conf
In order to Apache serve that website we have to enable its config file.
sudo a2ensite nextcloud.conf
now reload the apache.
systemctl reload apache2
Step 7:
Now we need to setup PHP before editing its config file search and change the values accordingly:
sudo vi /etc/php/7.4/apache2/php.ini
memory_limit = 512M
upload_max_filesize = 200M
max_execution_time = 360
post_max_size = 200M
date.timezone = Asia/Karachi
opcache.enable=1
opcache.interned_strings_buffer=8
opcache.max_accelerated_files=10000
opcache.memory_consumption=128
opcache.save_comments=1
opcache.revalidate_freq=1
now sudo systemctl restart apache2
sudo systemctl status apache2
Step 8: Open following ports in Firewall:
sudo firewall-cmd --permanent --zone=public --add-port=80/tcp
sudo firewall-cmd --permanent --zone=public --add-port=443/tcp
Now browse the link and setup your user name.
http://nextcloud.osgrove.com
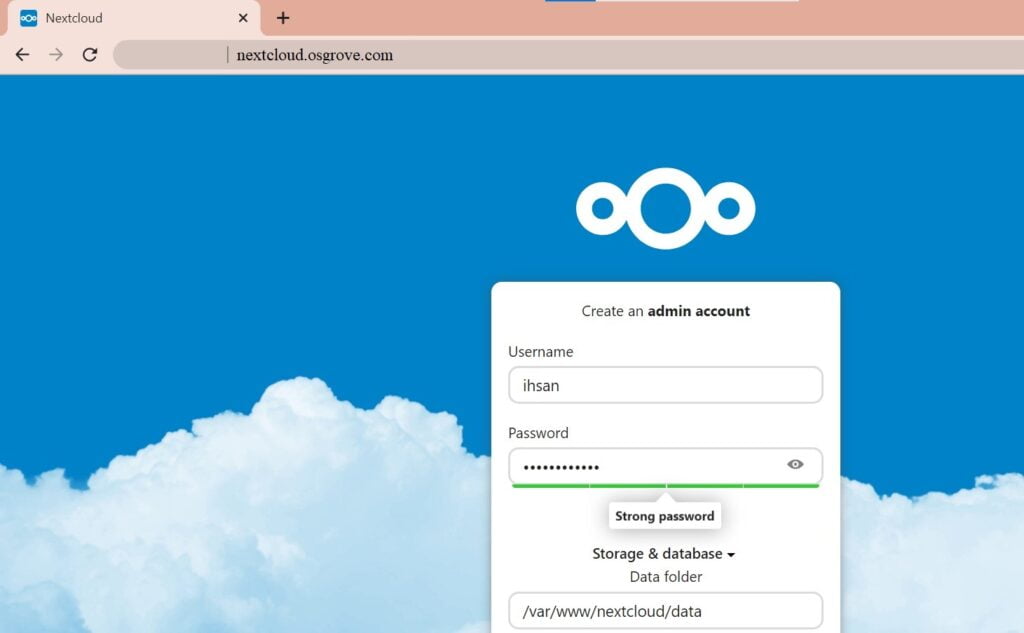
Now provide values for DataBase server db,user & password. user & password from GRANT we created earlier.
Step 9: Install NextCloud:
Finally, install nextcloud
Start using NextCloud now.
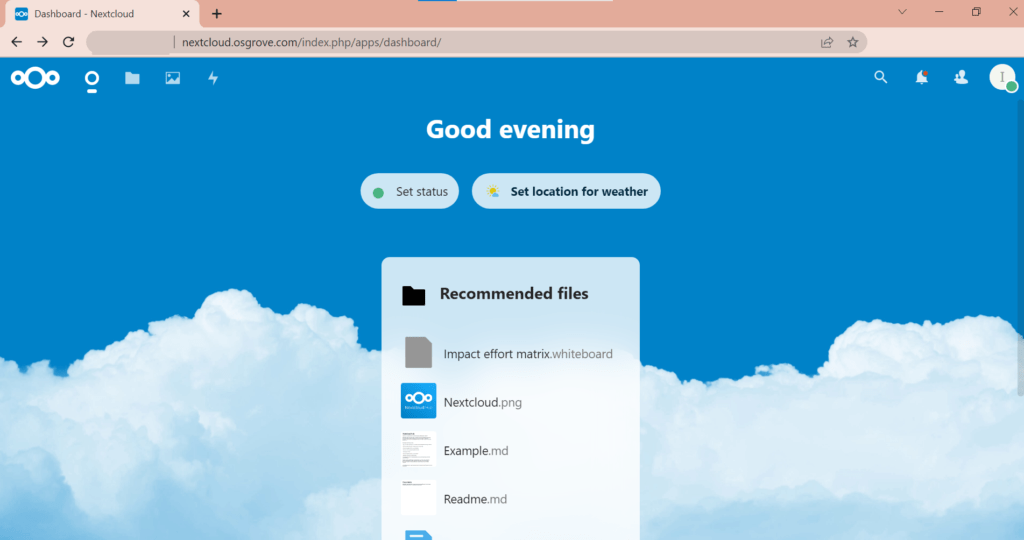
That’s about it. We have successfully configured NextCloud server.
If you want to learn how to install ClamAV click here.